


🛑 Don't Do This! The Top 7 Piercing Aftercare Mistakes
Tyler Martina

🛑 Don't Do This! The Top 7 Piercing Aftercare Mistakes
New piercings are awesome! But what isn’t awesome is messing up your piercing aftercare, which can lead to delayed healing times, pain and discomfort, and even piercing rejection. With all the conflicting information out there, what should you do?
The truth is, your body knows how to heal itself, you just need to allow it to do its job. But, this can be hard for many people, that is why we put together our list of the 7 biggest mistakes people make in piercing aftercare.
After reading this piercing aftercare list you will know what you need to avoid to ensure your new piercing heals, the most comfortable, fastest, and best way possible. So don’t make the mistake of not reading this list…
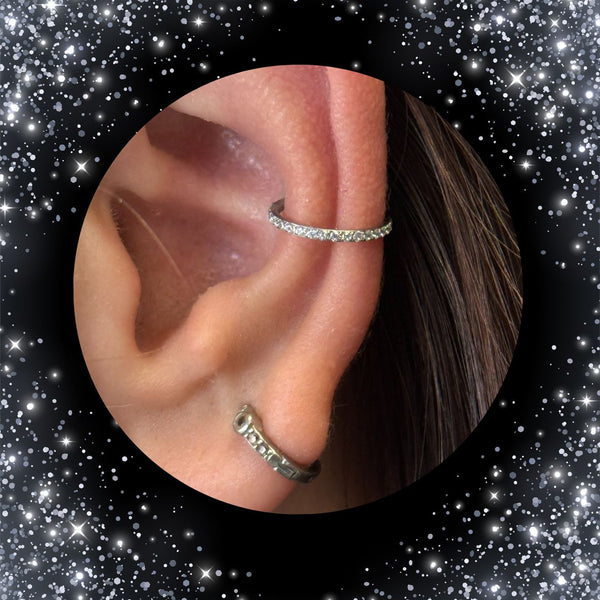
❌ Mistake 1: Twisting, Turning, or Playing with the Piercing Jewelry

Do not touch your jewelry. Let me say that again, “Do not touch your jewelry!”. Just leave it alone, the more you touch your new piercing, the longer the healing process will take. We know touching your new piercing is tempting, but just say “No!”.
The Mistake
Rotating jewelry, playing with it, bumping it, grabbing it to show it off to your friends, pushing it forward so it’s easier to see in your selfie, and any other weird reason you can come up with for touching it.
Why It's Harmful
Causes Micro Trauma: Every twist, turn, or touch tears the fragile, healing tissue (the fistula) inside the piercing channel. This introduces bacteria and causes irritation, leading to painful piercing bumps and possible rejection.
The Solution
Hands Off: Leave it alone! Only touch the jewelry immediately before cleaning, and do not twist it while cleaning. Spray the sterile saline solution and let it soak and air dry.
❌ Mistake 2: Using the Wrong Cleaning Products

Again, leave your piercing alone. Only use sterile saline spray to clean your new piercing, and only use that sparingly as well. Other products will damage your piercing and delay the healing process.
The Mistake
Using Rubbing Alcohol, Hydrogen Peroxide, Antibacterial Soap (like Dial), or ointments (like Neosporin).
Why It's Harmful
Cell Death & Clogging: Alcohol and peroxide are too harsh, they dry out the area and kill the vital, healthy skin cells needed for healing, leading to scarring and prolonged recovery. Ointments trap dirt and block oxygen.
The Solution
Sterile Saline Only: Use a pre-mixed, store-bought sterile saline spray like Drip. Avoid homemade salt mixes, which are hard to sterilize and often too concentrated.
❌ Mistake 3: Not Downsizing You Piercing Jewelry

When you get the initial piercing you are going to have a longer piercing post to accommodate for swelling. As your piercing heals the swelling will go down, when this happens, you will need to downsize. This will help your piercing heal better by preventing snagging and migration.
The Mistake
Leaving the long initial post in your piercing for the entire healing period.
Why It's Harmful
Snagging & Migration: The original post is longer to accommodate swelling. Once swelling subsides (usually 4-8 weeks), the excess length causes the bar to move and snag on hair, towels, and clothing. This friction causes chronic irritation and can make the piercing heal crooked (migrate).
The Solution
Downsize your jewelry: Return to your piercer for a quick, professional jewelry change where they will install a better fitting shorter post. This crucial step minimizes movement and accelerates the final stages of healing, and makes it much more comfortable.
To learn more about piercing downsizing and why you should almost always downsize, click here.
❌ Mistake 4: Sleeping Directly On Your New Piercing

Sleeping on your piercing consistently while it is healing is the number one cause of the dreaded piercing bump. That means you need to avoid sleeping directly on it as much as possible. Luckily for you, and your piercing, there is an easy solution… the travel pillow!
The Mistake
Putting direct pressure on a new ear, face, or body piercing while sleeping.
Why It's Harmful
Pressure & Angle: Constant pressure prevents blood flow, causes swelling, and forces the jewelry to shift. This is the main culprit behind piercing bumps and a crooked healing channel.
The Solution
The Travel Pillow: Use a travel pillow (the U-shaped kind) and place your pierced area comfortably into the hole. This keeps the piercing out of contact with anything and pressure free all night.
❌ Mistake 5: Submerging Your Piercing in Standing Water

A piercing looks great at the pool, the hot tub, or the beach! But, while your new piercing is healing, submerging it in water is a big “no, no”. If you must swim, then postpone the new piercing until you have the time to let it heal properly.
The Mistake
Going swimming in pools, hot tubs, lakes, or fully submerging your new piercing in any way during the initial healing phase.
Why It's Harmful
Bacterial Soup (By Campbells!): All bodies of standing water harbor bacteria. Your piercing is an open wound and is highly susceptible to waterborne pathogens, which can lead to infections and more.
The Solution
Shower Only: Stick to quick, gentle showers. Do not swim at all for the first 4-6 weeks. If you can’t avoid swimming, then do not get pierced until you have the time to let it heal properly.
❌ Mistake 6: Drying with Cotton Swabs, Balls, or Tissue

Just let your piercing air dry. It is just too risky to try and dry it in the early healing stages, especially with cotton or tissue which are notorious for flaking off and getting caught on jewelry and embedded in the piercing channel.
The Mistake
Drying your new piercing using cotton swabs (Q-tips) cotton balls, or tissue.
Why It's Harmful
Fibers & Irritation: Tiny cotton fibers can shed, get caught around the jewelry, and embed themselves into the healing wound. This is a source of chronic irritation and can cause bumps.
The Solution
Spray & Go: Spray the sterile saline directly onto the piercing site. If you need to gently remove stubborn "crusties" (dried lymph), use a piece of clean, non-woven gauze that is less likely to shed fibers, but probably just leave it alone.
❌ Mistake 7: Changing the Jewelry Too Soon

Piercings are great because you can change up the piercing jewelry to change your look. But with a healing piercing you are just going to have to wait (except for a downsize, which is a great opportunity to wear something new).
The Mistake
Removing the original jewelry to wear a “fashion” piece before the piercing is fully healed. We also recommend never wearing “fashion jewelry” because of the high likelihood of irritating even a fully healed piercing.
Why It's Harmful
Closure & Damage: Piercings can shrink or close in minutes, especially if they are new! Removing the jewelry also risks ripping out the fragile, healing tissue, setting your recovery back weeks.
The Solution
Wait it Out: Only switch to different jewelry (other than the downsize) once the piercing has been deemed fully healed by a professional piercer.
✅ The 3 Step Mr. Inkwells Method: Simple & Stress-Free Healing
Step 1: Clean: Twice a day with a sterile saline spray.
Step 2: Leave it Alone: No touching, no twisting, and no pressure.
Step 3: Be Patient: Time is the only thing that will truly heal your new piercing.
If you have a new piercing and have any concerns about its healing, do not attempt to fix it yourself. Stop by Mr. Inkwells, or your local professional piercing studio for check up (free at Mr. Inkwells) so you can heal your piercing the best way possible.
See you soon!


0 comments